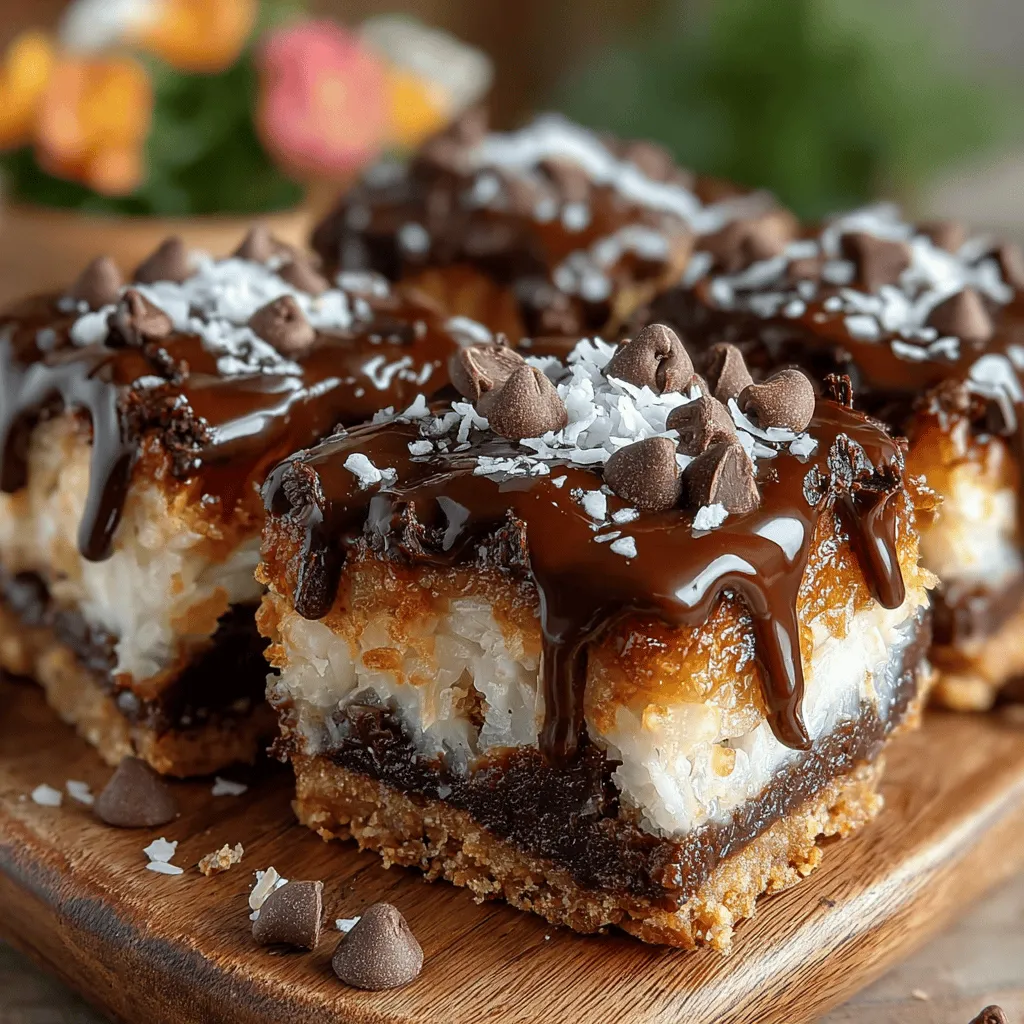
No-bake desserts have taken the culinary world by storm, offering a perfect blend of convenience and flavor without the need for an oven. Among the most enticing of these creations are Chewy Chocolate Coconut Bliss Bars, an irresistible treat that marries the rich, indulgent taste of chocolate with the tropical essence of coconut. These bars are not only delicious but also cater to a variety of dietary preferences, making them an excellent choice for anyone looking for a healthy snack or dessert option.
The growing popularity of no-bake recipes can be attributed to their simplicity and time-saving nature. For those who lead busy lives, whipping up a quick, satisfying treat is a game-changer. Chewy Chocolate Coconut Bliss Bars can be prepared in just a few minutes and require no baking time, allowing you to enjoy a delightful dessert without the hassle of preheating the oven or monitoring baking times. Whether you’re a busy parent, a student, or simply someone who loves to indulge in sweet treats, these bars fit seamlessly into your lifestyle.
What makes these bars even more appealing is their versatility. They can be easily adapted to meet various dietary needs, including gluten-free, vegan, and nut-free options. This adaptability means that everyone can enjoy the blissful combination of chocolate and coconut, making these bars a perfect addition to any gathering or a satisfying snack for yourself.
Understanding the Ingredients
To truly appreciate the Chewy Chocolate Coconut Bliss Bars, it’s essential to delve into the key ingredients that contribute to their delightful flavor and texture. Each component is chosen not only for its taste but also for its nutritional benefits, ensuring that you can indulge without the guilt.
Exploring Rolled Oats
Rolled oats are the foundation of these bliss bars, providing both texture and nutrition. Rich in dietary fiber and protein, oats are known for their ability to keep you feeling full and satisfied. The fiber content in rolled oats aids in digestion and can help regulate blood sugar levels. Additionally, oats contribute to the chewy texture of the bars, creating a satisfying bite that complements the smoothness of the nut butter and the richness of the cocoa.
Importance of Shredded Unsweetened Coconut
Unsweetened shredded coconut plays a crucial role in the overall flavor profile of the Chewy Chocolate Coconut Bliss Bars. Low in sugar yet high in healthy fats, coconut adds a distinct tropical flavor that elevates the bars to a new level of deliciousness. The natural fats found in coconut are beneficial for heart health and can provide a quick source of energy. Moreover, the shredded coconut enhances the chewiness of the bars, ensuring that each bite is packed with texture and flavor.
The Role of Nut Butter
Nut butter is another star ingredient in this recipe, offering creaminess and serving as a binding agent for the bars. Almond butter is a popular choice, but you can easily substitute it with other options like peanut butter or sunflower seed butter, depending on your preferences or dietary restrictions. Nut butter not only contributes to the rich, indulgent taste of the bars but also provides healthy fats, protein, and essential vitamins and minerals. This makes the Chewy Chocolate Coconut Bliss Bars a satisfying snack that fuels your body.
Sweeteners: Honey vs. Maple Syrup
The choice of sweetener can significantly impact the overall flavor of your bars. Both honey and maple syrup are natural sweeteners that bring unique characteristics to the table. Honey provides a distinct floral flavor and has antibacterial properties, while maple syrup offers a warm, earthy sweetness that pairs beautifully with chocolate and coconut. From a nutritional standpoint, both options contain beneficial antioxidants and can be used in moderation to create a healthier dessert. Understanding the nuances of these sweeteners allows you to personalize the recipe to your taste preferences.
Cocoa Powder: The Chocolate Element
No chocolate dessert is complete without cocoa powder, which serves as the chocolate element in these bliss bars. Packed with antioxidants, cocoa powder is not only a delicious addition but also offers several health benefits, including improved heart health and enhanced mood. The rich, deep flavor of cocoa powder enriches the overall taste of the bars, making them a decadent yet healthy treat that satisfies your chocolate cravings.
Step-by-Step Instructions for Preparation
Now that we’ve explored the essential ingredients that make up the Chewy Chocolate Coconut Bliss Bars, it’s time to dive into the preparation process. With just a few simple steps, you can create these delightful treats in no time.
Preparing the Baking Dish
The first step in making your Chewy Chocolate Coconut Bliss Bars is to prepare your baking dish. A square or rectangular dish works best, typically around 8×8 inches. Line the bottom and sides of the dish with parchment paper, leaving some overhang on the edges. This will make it easier to remove the bars once they have set. Parchment paper ensures that the bars don’t stick to the dish, allowing for clean cuts and easy serving later on.
Mixing Dry Ingredients
Next, it’s time to mix your dry ingredients. In a large mixing bowl, combine the rolled oats, unsweetened shredded coconut, and cocoa powder. Stir these ingredients together until they are evenly distributed. This step is crucial for ensuring that every bite of your Chewy Chocolate Coconut Bliss Bars is packed with flavor. The combination of oats and coconut creates a hearty base, while the cocoa powder infuses a rich chocolate flavor throughout the mixture.
As you mix, take a moment to appreciate the textures and aromas of your ingredients. The oats provide a nutty scent, while the coconut adds a hint of tropical sweetness. This sensory experience is just the beginning of the indulgent journey that awaits you in the form of these bliss bars.
By focusing on the quality of your ingredients and following these initial preparation steps, you set the stage for a delicious, satisfying treat that you and your loved ones will enjoy. In the next section, we will dive deeper into the remaining steps of creating these Chewy Chocolate Coconut Bliss Bars, ensuring that you have all the necessary details to achieve perfect results every time.

Techniques for Ensuring Even Distribution of Dry Ingredients
When preparing your Chewy Chocolate Coconut Bliss Bars, achieving an even distribution of dry ingredients is crucial. Start by sifting together the dry components, such as flour and cocoa powder, to break up any clumps. This process not only helps in mixing but also aerates the ingredients, leading to a lighter texture.
Once sifted, use a whisk to combine the dry ingredients thoroughly. This step ensures that each component is evenly coated and ready to blend seamlessly with the wet ingredients. If you’re using coconut flakes or chopped nuts, consider tossing them in a small amount of flour before mixing. This technique helps them stay suspended in the batter rather than sinking to the bottom during baking.
Combining Wet Ingredients
To create a delightful flavor profile in your bars, it’s essential to combine the wet ingredients properly. Start by mixing the melted coconut oil with the sweeteners, such as maple syrup or honey, in a medium bowl. Whisk them together until the mixture appears homogenous. The goal is to dissolve the sweeteners completely, allowing for an even sweetness throughout the bars.
Next, add in any additional wet components, such as vanilla extract or almond milk. For a smooth mixture, ensure all ingredients are at room temperature. Cold ingredients can cause the coconut oil to solidify, leading to an uneven texture. Whisk everything together vigorously until you achieve a silky consistency.
Bringing It All Together
Once you have your dry and wet ingredients prepared, it’s time to bring them together. Pour the wet mixture into the bowl containing your dry ingredients. Now, this is where texture plays a significant role. You want to mix the ingredients until they are just combined; overmixing can lead to tough bars.
Gently fold the dry ingredients into the wet mixture using a spatula or wooden spoon. This method ensures that the flour isn’t overworked, maintaining the chewiness of the bars. You should aim for a slightly thick mixture that holds its shape but isn’t dry.
Incorporating Chocolate Chips
Adding chocolate chips is a highlight of this recipe. To ensure the chips remain whole and don’t break down during mixing, use a folding technique. After your batter is well combined, sprinkle the chocolate chips over the top and gently fold them into the mixture with a spatula. This method minimizes the risk of breaking the chips while ensuring an even chocolate distribution throughout your bars.
Feel free to experiment with different types of chocolate chips, such as dark, semi-sweet, or even white chocolate, to suit your preference.
Pressing Mixture into the Pan
Once your mixture is ready, it’s time to transfer it to the prepared baking pan. Use a spatula to scoop the mixture and spread it evenly across the bottom of the pan. The key to achieving stable, chewy bars lies in compacting the mixture firmly. Press down with your hands or the spatula to ensure that the mixture is tightly packed. This compression helps the bars hold their shape during baking and results in a dense, satisfying bite.
Chilling the Bars
After pressing your mixture into the pan, chilling the bars is a critical step. Cover the pan with plastic wrap and refrigerate for at least 30 minutes before baking. Chilling the mixture helps it firm up, which can lead to a better texture once baked. The cold bars will hold their shape better and prevent spreading during the baking process.
Optional Chocolate Drizzle
Elevate your Chewy Chocolate Coconut Bliss Bars with a chocolate drizzle. To melt chocolate safely, use a double boiler or a microwave. If using the microwave, heat the chocolate in 15-second intervals, stirring between each session until completely melted and smooth.
Once melted, allow it to cool slightly before drizzling over the cooled bars. You can use a fork or a piping bag to create beautiful patterns. This optional step not only adds a touch of elegance but also enhances the chocolate flavor.
Serving Suggestions and Storage
These Chewy Chocolate Coconut Bliss Bars are incredibly versatile and can be enjoyed in numerous ways. Consider pairing them with fresh fruits, such as sliced bananas or strawberries, for a delightful contrast. A drizzle of nut butter, such as almond or cashew, can also elevate the flavor and add a creamy texture.
Best Practices for Storage
To maintain freshness and the optimal texture of your bars, store them in an airtight container. If you live in a warm climate, refrigeration is recommended to prevent melting. The bars will generally last for about one week at room temperature but can be refrigerated for up to two weeks.
For longer storage, consider freezing the bars. Wrap them individually in plastic wrap and place them in a freezer-safe container. This way, they can be kept for up to three months. When ready to enjoy, simply thaw them at room temperature for a few minutes.
Health Benefits of Chewy Chocolate Coconut Bliss Bars
Not only are these bars delicious, but they also pack a nutritional punch. They feature wholesome ingredients that offer various health benefits.
Nutritional Value Overview
Calculating the macros for a single Chewy Chocolate Coconut Bliss Bar can provide insights into its nutritional content. Depending on the specific ingredients used, each bar typically contains around 200 calories, 5 grams of protein, 10 grams of fat, and approximately 25 grams of carbohydrates. These values may vary based on portion size and specific ingredient choices.
Benefits of Whole Foods
Using whole food ingredients in these bars brings a wealth of nutritional benefits. For example, coconut is rich in healthy fats, which can provide energy and promote heart health. The use of oats adds dietary fiber, which aids digestion and helps maintain stable blood sugar levels.
Incorporating natural sweeteners like honey or maple syrup instead of refined sugars ensures that you are consuming a product with a lower glycemic index, making it a better option for sustained energy. Overall, these bars are a great treat that can fit into a balanced diet.
Conclusion
Chewy Chocolate Coconut Bliss Bars are a fantastic choice for anyone looking for a quick, healthy, and delicious treat. Their chewy texture, combined with the rich flavor of chocolate and coconut, makes them a satisfying snack or dessert option.
These bars are not only tasty but also cater to a wide range of dietary preferences, allowing for easy customization based on personal tastes. Whether enjoyed as an afternoon snack, post-workout fuel, or a dessert for the whole family, they are sure to please.
Encourage yourself to try making these bars at home, and enjoy the benefits of incorporating wholesome ingredients into your diet. With their versatility and rich flavor, you may find that they become a staple in your snack repertoire.
No-Bake Chocolate Coconut Bars

Indulge in the delightful simplicity of Chewy Chocolate Coconut Bliss Bars, a no-bake treat that’s perfect for any occasion. This easy recipe combines the rich flavors of chocolate and coconut while being adaptable to various dietary needs, making it a healthy snack or dessert option for everyone. With wholesome ingredients like rolled oats, nut butter, and natural sweeteners, these bars are not only delicious but also nutritious. Perfect for busy lifestyles, they’re quick to prepare and satisfying to enjoy!


