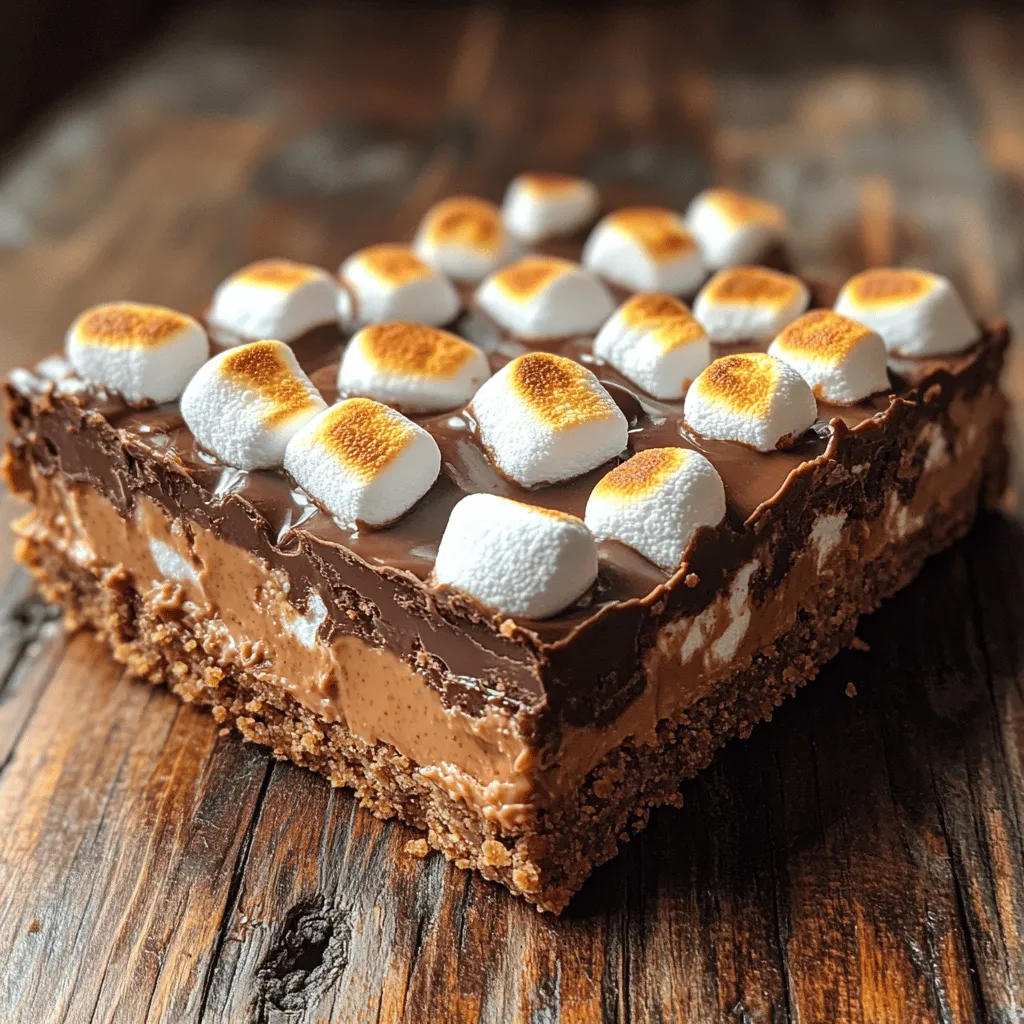
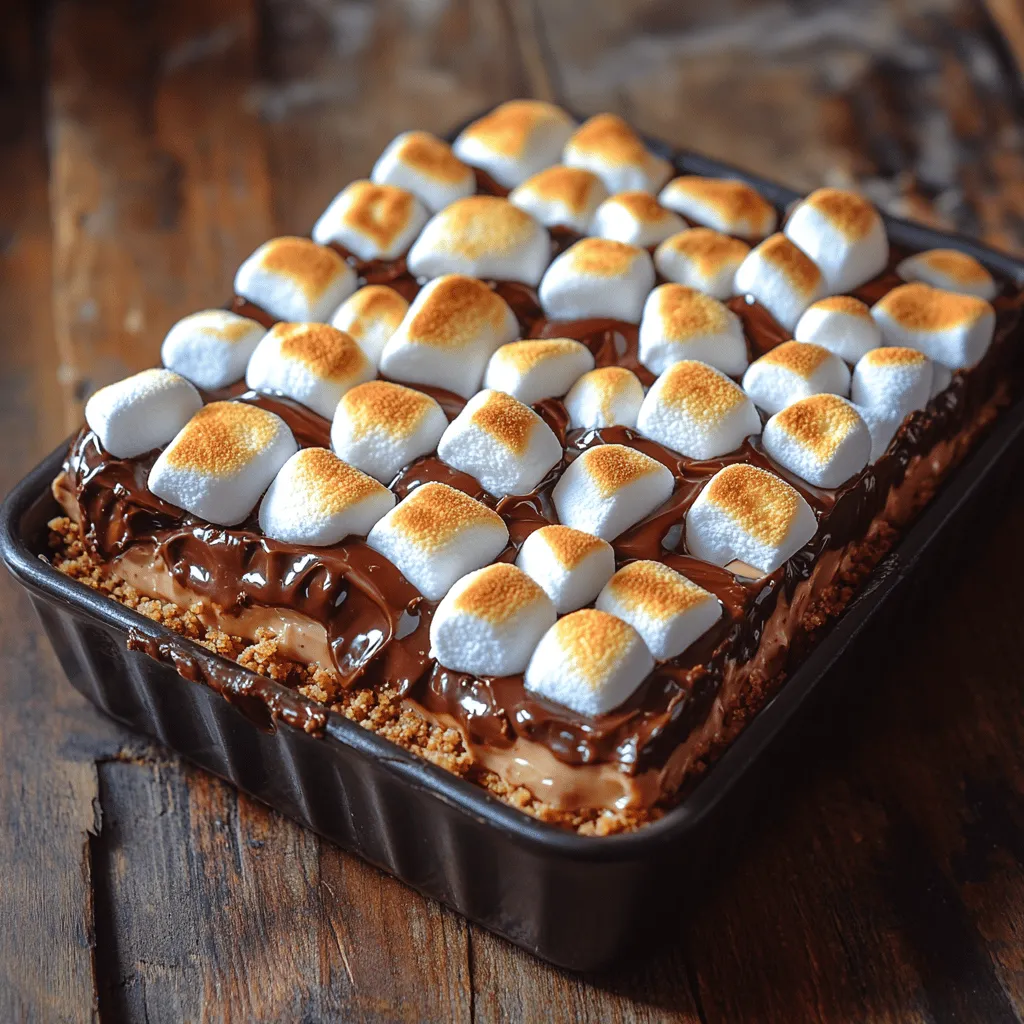
Campfire Dreams No-Bake S’mores Bars: A Sweet Escape to Summer Nights
The allure of s’mores transcends generations, evoking memories of summer nights spent around a crackling campfire, filled with laughter and the intoxicating aroma of toasted marshmallows. For many, the act of roasting marshmallows and assembling that perfect treat is a cherished tradition, but not everyone has the opportunity to enjoy this classic dessert in the great outdoors. This is where the Campfire Dreams No-Bake S’mores Bars come into play—an innovative recipe that captures the essence of s’mores without the need for an open flame.
These bars are a delightful homage to the traditional s’mores, combining the crunchy texture of graham crackers with the richness of chocolate and the fluffiness of marshmallows. They are not only simple to make but also perfect for any occasion, whether you’re hosting a gathering, preparing a treat for a family night, or simply indulging your sweet tooth. In this article, we will delve into the ingredients that make up these scrumptious bars, followed by a detailed, step-by-step guide to creating this no-bake delight in your own kitchen.
Understanding the Ingredients of No-Bake S’mores Bars
To appreciate the magic of Campfire Dreams No-Bake S’mores Bars, it’s essential to understand the core components of the recipe. Each ingredient contributes its unique flavor and texture, coming together to create a harmonious balance that invokes the spirit of traditional s’mores.
Graham Cracker Crumbs: The Crunchy Base
At the heart of any s’mores recipe lies the graham cracker, a staple that provides the essential crunch. In these no-bake bars, graham cracker crumbs serve as the base, delivering a satisfying texture that contrasts beautifully with the gooey filling. The subtle sweetness and slightly nutty flavor of graham crackers are what make them integral to the s’mores experience.
When preparing your crust, ensure you crush the graham crackers finely for a uniform texture. This not only enhances the bars’ structural integrity but also allows for better binding with other ingredients.
Cocoa Powder: Adding Richness
Cocoa powder plays a crucial role in enriching the flavor profile of the no-bake s’mores bars. This ingredient introduces a deep, chocolatey essence that complements the sweetness of marshmallows and sugar. The bitterness of cocoa powder balances the overall sweetness, resulting in a well-rounded taste that appeals to chocolate lovers.
For those who prefer a more intense chocolate flavor, consider using dark cocoa powder, which will elevate the richness of the bars even further.
Unsalted Butter and Granulated Sugar: The Binding Agents
Unsalted butter is essential in creating a cohesive crust that holds the bars together. It not only provides moisture but also adds a layer of richness that enhances the overall flavor. When melted and combined with the graham cracker crumbs and sugar, the butter acts as a binding agent, ensuring that your bars maintain their structure when cut.
Granulated sugar is equally important, as it adds sweetness and helps balance the flavors of the other ingredients. The combination of these two elements creates a base that is both delicious and sturdy, perfect for accommodating the gooey filling above.
Mini Marshmallows: The Classic S’mores Element
No s’mores recipe would be complete without marshmallows, and in this no-bake variation, mini marshmallows are the star. They provide the signature sweetness and fluffy texture that s’mores aficionados crave. When mixed into the filling, these marshmallows add a delightful chewiness and a nostalgic touch that transports you straight to those campfire nights.
When selecting marshmallows, opt for mini ones, as they blend seamlessly into the mixture and create a uniform texture throughout the bars. If you prefer a more decadent experience, you can also fold in some larger marshmallows for added gooeyness.
Milk Chocolate Chips and Peanut Butter: The Creamy Layer
The combination of milk chocolate chips and peanut butter creates a creamy layer that takes these bars to the next level. Milk chocolate brings a smooth sweetness that pairs perfectly with the rich flavor of peanut butter. Together, they create a luscious filling that is both satisfying and indulgent.
For those with dietary restrictions or preferences, consider substituting milk chocolate chips with dark chocolate or even using alternative nut butters like almond or cashew butter to explore different flavor profiles.
Vanilla Extract and Salt: Enhancing Flavor
A splash of vanilla extract is a simple yet effective way to elevate the flavor of baked goods and desserts alike. In this recipe, the vanilla adds warmth and depth, enhancing the richness of the chocolate and peanut butter while harmonizing the flavors.
Additionally, a pinch of salt is a crucial element that balances sweetness, ensuring that the bars are not overly sugary. Salt enhances the overall taste, making all the flavors pop and creating a more satisfying treat.
Step-by-Step Instructions for Making No-Bake S’mores Bars
Now that we’ve explored the essential ingredients, let’s dive into the step-by-step process of creating these Campfire Dreams No-Bake S’mores Bars. Follow these instructions carefully to ensure a successful outcome:
Preparing the Base: The Foundation of Flavor
1. Gather Your Ingredients: Before you start, make sure you have all the necessary ingredients on hand. This includes graham cracker crumbs, cocoa powder, unsalted butter, granulated sugar, mini marshmallows, milk chocolate chips, peanut butter, vanilla extract, and salt.
2. Crush the Graham Crackers: Using a food processor or a resealable plastic bag and a rolling pin, crush the graham crackers until they reach a fine crumb consistency. Aim for a texture similar to sand, which will help the crust hold together.
3. Mix the Crust Ingredients: In a mixing bowl, combine the graham cracker crumbs, cocoa powder, granulated sugar, and a pinch of salt. Stir until evenly mixed. Melt the unsalted butter in a microwave-safe bowl or a small saucepan over low heat, then pour it into the dry ingredients. Mix until all the crumbs are coated and the mixture resembles wet sand.
4. Press the Mixture into the Pan: Line an 8×8-inch baking dish with parchment paper for easy removal. Pour the crust mixture into the dish and press it firmly into an even layer using the back of a measuring cup or your hands. Make sure the crust is tightly packed to prevent crumbling later on.
5. Prepare the Filling: In a microwave-safe bowl, combine the milk chocolate chips and peanut butter. Microwave in 30-second intervals, stirring in between, until the mixture is smooth and fully melted. This usually takes about 1-2 minutes, depending on your microwave.
6. Add Vanilla and Marshmallows: Once the chocolate and peanut butter are well combined, remove the bowl from the microwave and stir in the vanilla extract. Then gently fold in the mini marshmallows, ensuring they are evenly distributed throughout the mixture.
7. Spread the Filling Over the Crust: Pour the marshmallow-chocolate filling over the prepared crust. Use a spatula to spread it evenly, ensuring that it covers the entire surface of the crust.
As you begin to create your Campfire Dreams No-Bake S’mores Bars, the anticipation builds. The combination of rich chocolate, creamy peanut butter, and fluffy marshmallows promises a treat that’s both nostalgic and satisfying. In the following sections, we will explore the chilling process, cutting techniques, and tips on serving these delightful bars, ensuring you can enjoy them to the fullest. Stay tuned for the next part of this delicious journey!

Creating the Campfire Dreams No-Bake S’mores Bars is not only a rewarding experience but also a delightful way to bring the classic campfire treat into your home. In this section, we will dive deeper into the detailed steps for assembling these bars, from forming the crust to serving them up for your next gathering.
Forming the Crust: Ensuring Stability
The crust is the foundation of your S’mores bars, and getting it right is essential for a satisfying texture and taste. Here are some techniques to ensure your crust is stable and evenly spread:
Techniques for Pressing the Crust into the Baking Dish
1. Choose the Right Dish: A 9×9 inch square baking dish works best for this recipe, but you can also use a larger dish for thinner bars.
2. Use Parchment Paper: Line the baking dish with parchment paper, allowing some overhang on the sides. This will make it easier to lift the bars out after chilling.
3. Press Firmly: Pour the graham cracker mixture into the lined baking dish. Use the back of a measuring cup or your hands to press the mixture firmly into the bottom of the dish. Make sure to apply even pressure to avoid any gaps or air pockets.
4. Check for Evenness: After pressing, inspect the surface to ensure it is level. An even layer is crucial for consistent texture throughout the bars.
Importance of an Even Layer for Consistent Texture
An uneven crust can lead to uneven cooking and texture, which may result in some parts of the bars being too crumbly while others are too dense. A well-formed crust provides stability and a perfect base to hold the delicious chocolate and marshmallow layers.
Creating the Chocolate Layer: Melting with Care
Next up is the chocolate layer, which adds a rich and creamy flavor to the bars. Melting chocolate requires some care to ensure it doesn’t burn, so follow these steps:
Step-by-Step on Melting Chocolate and Peanut Butter
1. Ingredients: In a microwave-safe bowl, combine 1 cup of semi-sweet chocolate chips with 1/2 cup of creamy peanut butter.
2. Microwave in Intervals: Heat the mixture in the microwave in 30-second intervals. Stir the mixture after each interval to promote even melting.
3. Stirring to Prevent Burning: Continue this process until the mixture is fully melted and smooth. Stirring is crucial as it helps distribute the heat evenly and prevents the chocolate from seizing or burning.
Importance of Stirring to Prevent Burning
Chocolate can easily go from perfectly melted to burnt if not monitored closely. Stirring helps maintain a consistent temperature and ensures that all chocolate chips melt evenly, resulting in a smooth, creamy layer.
Layering the Chocolate: Achieving the Perfect Spread
Once your chocolate and peanut butter mixture is smooth, it’s time to layer it over your crust.
Techniques for Pouring and Spreading the Mixture
1. Pouring: Carefully pour the melted chocolate mixture over the pressed graham cracker crust. Start from the center and let it flow toward the edges.
2. Spreading: Use an offset spatula or the back of a spoon to gently spread the chocolate evenly across the crust. Be careful not to disturb the crust as you spread.
Tips for Eliminating Air Bubbles for a Smooth Finish
To achieve a smooth top layer, gently tap the baking dish on the counter a few times. This will help release any air bubbles trapped in the chocolate layer. Alternatively, you can use a toothpick to pop any visible bubbles before the chocolate sets.
Topping with Marshmallows: The Finishing Touch
The final layer is the mini marshmallows, which will give your bars that classic s’mores feel.
How to Evenly Distribute Mini Marshmallows
1. Sprinkle Generously: Evenly sprinkle 2 cups of mini marshmallows over the melted chocolate layer. Make sure to cover the entire surface for uniform toasting.
2. Press Down Lightly: Gently press the marshmallows into the chocolate layer to ensure they stick, which will help them hold their shape during toasting.
Instructions for Toasting Marshmallows Safely
1. Oven Method: Preheat your oven’s broiler. Place the baking dish under the broiler for about 1-2 minutes. Keep a close eye on the marshmallows, as they can burn quickly. When they are golden brown, remove the dish from the oven.
2. Kitchen Torch Method: If you have a kitchen torch, you can carefully toast the marshmallows until they are golden brown and slightly puffed.
Chilling the Bars: The Key to Setting
Once your bars are assembled, they need time to chill and set properly.
Importance of Chilling for the Right Texture
Chilling helps the chocolate layer firm up and allows the marshmallows to meld with the chocolate, resulting in a cohesive bar that holds its shape when sliced.
Timeframe for Optimal Results
Refrigerate the assembled bars for at least 2 hours, or until they are completely set. For best results, consider leaving them in the fridge overnight.
Slicing and Serving: Presenting Your Creation
After chilling, it’s time to slice and serve your Campfire Dreams No-Bake S’mores Bars.
Techniques for Cutting the Bars Without Crumbling
1. Use a Sharp Knife: A sharp knife is essential for clean cuts. For even better results, run the knife under hot water and dry it before slicing; this will help melt through the chocolate layer smoothly.
2. Cutting into Squares: Remove the bars from the baking dish using the parchment overhang. Place on a cutting board and slice into squares or rectangles, depending on your preference.
Suggestions for Serving and Enjoying the Bars
Serve your bars chilled or at room temperature. They pair beautifully with a glass of cold milk, hot chocolate, or even a scoop of vanilla ice cream for an indulgent treat. For gatherings, consider placing the bars on a decorative platter and garnishing with chocolate shavings or additional crushed graham crackers to elevate their presentation.
Nutritional Information and Serving Suggestions
Understanding the nutritional content of your Campfire Dreams No-Bake S’mores Bars can help you enjoy them more mindfully.
Nutritional Breakdown of Campfire Dreams No-Bake S’mores Bars
– Caloric Information per Serving: Each bar contains approximately 180-200 calories, depending on the size and ingredients used.
– Breakdown of Key Nutrients:
– Fat: 9g (mostly from chocolate and peanut butter)
– Carbohydrates: 25g (from graham crackers and marshmallows)
– Protein: 3g (from peanut butter)
Serving Suggestions for Maximum Enjoyment
– Beverage Pairings: Consider pairing these bars with a cold glass of milk, a cup of coffee, or a sweet dessert wine to complement their rich flavors.
– Presentation Tips for Gatherings: When serving at parties, slice the bars into smaller bites for easy sharing. You can also add skewers to individual pieces to mimic the feel of traditional s’mores.
Conclusion: The Joy of No-Bake S’mores Bars
The Campfire Dreams No-Bake S’mores Bars encapsulate the nostalgic flavors of traditional s’mores in a simple, no-bake format. Whether you’re hosting a summer party, seeking a quick dessert for a family gathering, or simply indulging in a sweet treat at home, these bars are sure to delight. With straightforward instructions and accessible ingredients, anyone can recreate this beloved dessert, bringing a taste of the great outdoors into their kitchen. Enjoy every gooey, chocolatey bite, and share the joy of these delectable treats with family and friends.
No-Bake S’mores Bars

Experience the joy of summer nights all year round with Campfire Dreams No-Bake S’mores Bars. This easy-to-make recipe captures the classic s’mores flavor without the need for a campfire. With a crunchy graham cracker base, rich chocolate, and fluffy marshmallows, these bars are perfect for any occasion. Discover the simple ingredients and step-by-step instructions to create this nostalgic treat in your own kitchen, delivering sweet satisfaction with every bite.


