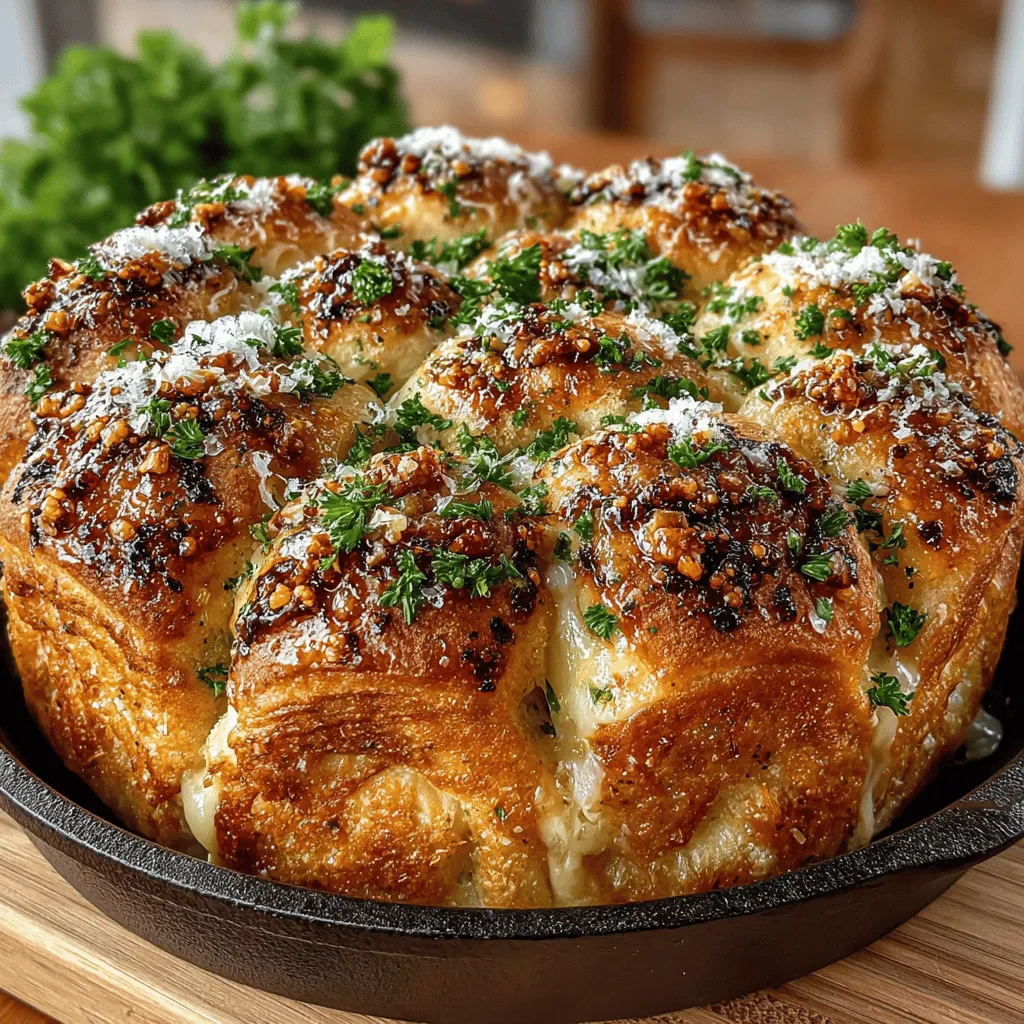
Cheesy Garlic Bliss Pull-Apart Rolls: The Ultimate Comfort Food
There’s something undeniably comforting about the aroma of freshly baked bread wafting through the kitchen. It evokes memories of family gatherings, cozy nights in, and the simple joy of sharing a delicious meal with loved ones. Among the myriad of bread recipes, few can rival the charm of homemade pull-apart rolls. Enter the Cheesy Garlic Bliss Pull-Apart Rolls—a delightful combination of fluffy bread, rich garlic flavor, and gooey cheese that transforms any meal into a special occasion.
These rolls are more than just a side dish; they are a celebration of flavor and texture that can serve as an appetizer at a dinner party, a comforting accompaniment to a hearty soup, or even a snack to savor on a lazy afternoon. The unique flavor profile of these rolls, enhanced by the buttery garlic and melted cheese, will have everyone reaching for more. Whether you’re hosting a gathering or simply indulging in a personal treat, these rolls are sure to impress.
The Allure of Homemade Pull-Apart Rolls
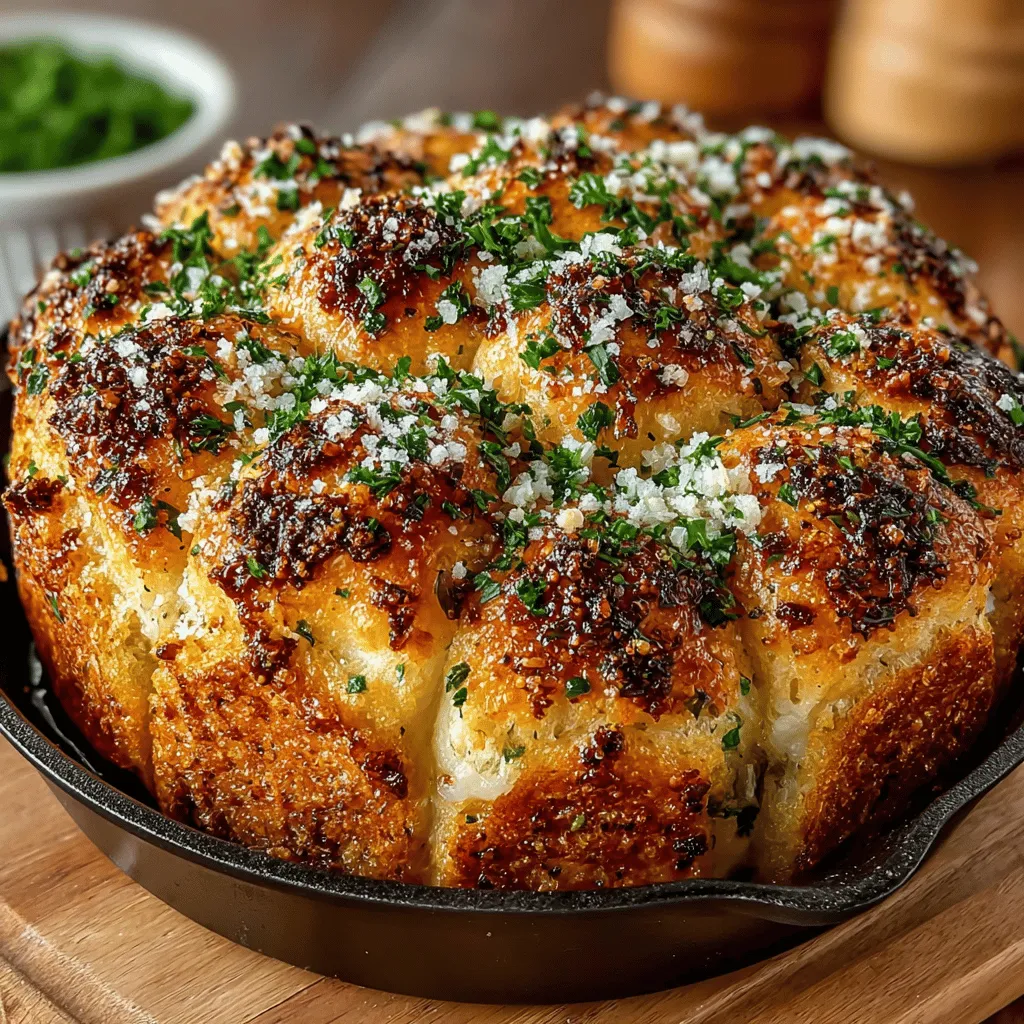
There’s an irresistible sensory experience that comes with fresh-baked bread. The moment you pull a tray of Cheesy Garlic Bliss Pull-Apart Rolls from the oven, you’re greeted with an intoxicating aroma that fills the air, inviting everyone to the table. The texture of these rolls is light and airy on the inside, while the outside is golden and slightly crispy, creating a delightful contrast that enhances every bite.
What makes pull-apart rolls so appealing is their shareable nature. They’re designed for fun and interaction, allowing you to tear off pieces with your hands and enjoy them in a communal setting. This makes them perfect for gatherings, where guests can partake in the experience together. The ease of serving and the joy of pulling apart each roll add a layer of excitement to your dining experience, making these rolls not just food, but a memorable part of your occasion.
Key Ingredients that Make These Rolls Special
To create the perfect Cheesy Garlic Bliss Pull-Apart Rolls, you need a handful of core ingredients that work in harmony to deliver outstanding flavor and texture.
– All-Purpose Flour: This is the backbone of your rolls, providing the necessary structure and texture. The right flour will help your rolls achieve that perfect balance of fluffiness and chewiness, making them irresistible.
– Active Dry Yeast: The yeast plays a critical role in fermentation and the rise of the dough. It’s essential for creating that light, airy texture we all love in bread. Proper activation of the yeast is crucial for a successful rise, ensuring that your rolls are soft and pillowy.
– Garlic and Parmesan Cheese: These ingredients are what truly define the flavor of these rolls. The aromatic garlic infuses every bite with savory goodness, while the Parmesan cheese adds a rich, nutty flavor that complements the garlic perfectly.
– Fresh Parsley and Italian Seasoning: These herbs not only enhance the flavor but also add a burst of freshness and aroma that elevates the entire dish. The combination of parsley and Italian herbs creates a well-rounded flavor profile that pairs beautifully with the cheese and garlic.
– Unsalted Butter and Warm Liquids: Using unsalted butter allows you to control the saltiness of your rolls, while warm liquids help to activate the yeast effectively. The right temperature for your liquids is crucial; it should be warm to the touch but not hot, ensuring that the yeast is awakened without being killed.
Step-by-Step Instructions for Perfect Rolls
Now that you’re familiar with the ingredients that make these rolls a true delight, let’s dive into the initial steps of creating your Cheesy Garlic Bliss Pull-Apart Rolls, starting with preparing the yeast mixture.
Preparing the Yeast Mixture
1. Activate the Yeast: Begin by measuring out your active dry yeast and warm water. The ideal temperature for activating yeast is between 100°F to 110°F. If you don’t have a thermometer, you can test it by feeling the water— it should feel warm to the touch but not hot. Dissolve the yeast in the warm water, adding a pinch of sugar to feed it. Allow the mixture to sit for about 5-10 minutes. You’ll know it’s ready when it becomes frothy and bubbly, indicating that the yeast is alive and ready to work its magic.
Mixing and Kneading the Dough
2. Combine the Dry Ingredients: In a large mixing bowl, combine the all-purpose flour, salt, and Italian seasoning. Mixing the dry ingredients ensures that the salt and seasonings are evenly distributed throughout the dough, which is crucial for consistent flavor.
3. Incorporate the Yeast Mixture: Once your yeast mixture is activated, add it to the dry ingredients, along with melted unsalted butter and any additional warm liquid specified in your recipe (like milk or water). Stir the mixture until it begins to come together.
4. Knead the Dough: Transfer the dough onto a floured surface. Knead it for about 8-10 minutes, or until it becomes smooth and elastic. This process develops the gluten in the flour, which is essential for creating the desired texture in your rolls. If the dough is too sticky, sprinkle a little more flour as needed, but be careful not to overdo it, as too much flour can lead to dense rolls.
As you knead, take a moment to appreciate how the dough transforms. It starts as a sticky mass and gradually becomes a soft, pliable ball. This tactile experience is one of the joys of bread-making, connecting you with the ingredients in a way that prepared foods simply cannot.
By following these initial steps with care and attention, you’re well on your way to creating Cheesy Garlic Bliss Pull-Apart Rolls that will delight your family and friends. In the next section, we will explore how to shape and bake these rolls to perfection, ensuring that your culinary creation is as beautiful as it is delicious.
The First Rise: Why It Matters
The first rise, or fermentation, is a crucial step in baking that profoundly impacts the flavor and texture of your Cheesy Garlic Bliss Pull-Apart Rolls. During this period, the yeast feeds on the sugars present in the dough, producing carbon dioxide gas and alcohol. This process not only helps the dough to expand but also develops complex flavors that enhance the overall taste of the rolls.
Allowing your dough to rise for at least one hour in a warm, draft-free environment permits the gluten to relax and the yeast to work its magic. You’ll know your dough is ready when it has doubled in size and feels soft and pillowy to the touch. This rise is essential for achieving that light, fluffy texture that makes pull-apart rolls so irresistible.
Crafting the Garlic Mixture
The garlic mixture is the heart of these rolls, infusing them with rich flavors that elevate every bite. To create this mouthwatering infusion, you’ll need melted butter, minced garlic, and a blend of herbs such as parsley and oregano.
Start by melting the butter in a small saucepan over low heat. Once melted, add the minced garlic and let it cook gently for about 1-2 minutes, just until fragrant. Be careful not to brown the garlic, as this will impart a bitter taste.
Once the garlic has softened, remove it from the heat and stir in your chosen herbs. The warmth of the butter will help release the essential oils from the herbs, creating a fragrant mixture that will coat the rolls beautifully. This garlic mixture is what gives the rolls their distinctive flavor, so don’t skimp on this step.
Shaping and Assembling the Rolls
With your dough risen and garlic mixture ready, it’s time to shape and assemble your rolls. Start by punching down the risen dough to release any air bubbles. Then, transfer it to a lightly floured surface and roll it out into a rectangle about ½ inch thick.
Using a sharp knife or pizza cutter, slice the dough into equal squares, approximately 2 inches by 2 inches. This will ensure uniform cooking and a pleasing appearance.
Next, take each square of dough and dip it into the garlic mixture, ensuring both sides are well-coated. This step is essential for flavor distribution throughout the rolls. Then, stack the squares vertically in a greased loaf pan, alternating the orientation to create a visually appealing look.
Once all squares are stacked, pour any remaining garlic mixture over the assembled rolls. This will enhance the flavor even further and ensure each roll is infused.
The Second Rise: Final Touch Before Baking
The second rise is just as critical as the first, providing the dough with another opportunity to expand and develop its airy texture. Cover the loaf pan with a clean kitchen towel or plastic wrap, and allow it to rise in a warm place for about 30-45 minutes, or until the rolls have puffed up and are touching each other.
This rise is essential for creating that fluffy interior that makes these pull-apart rolls so delightful. You’ll notice how the dough becomes light and airy as it continues to ferment, which is a good sign that your rolls will be soft and tender after baking.
Baking the Rolls to Golden Perfection
Preheating the Oven: Why Temperature Matters
Before you place your rolls in the oven, preheat it to 375°F (190°C). Preheating is crucial because it ensures the rolls start cooking at the right temperature from the moment they enter the oven. This initial heat helps create a crispy exterior while keeping the inside soft and fluffy.
Baking Tips for Achieving the Best Texture
When it comes to baking your Cheesy Garlic Bliss Pull-Apart Rolls, there are a few tips to ensure you achieve the best texture:
1. Use the Middle Rack: Position your oven rack in the center to ensure even heat distribution around the rolls.
2. Egg Wash (Optional): For an extra golden and shiny crust, consider brushing the tops of the rolls with a beaten egg before baking.
3. Cover with Foil: If you notice the tops browning too quickly, lightly cover the pan with aluminum foil during the last few minutes of baking to prevent burning while allowing the rolls to cook through.
How to Know When the Rolls Are Perfectly Done
Your rolls will generally take about 25-30 minutes to bake. They are done when they are golden brown on top and sound hollow when tapped on the bottom. Additionally, you can use an instant-read thermometer to check the internal temperature; it should read around 190°F (88°C) when fully baked.
Cooling and Serving Suggestions
Once your rolls are baked to perfection, remove them from the oven and let them cool in the pan for about 5 minutes. This brief cooling period allows the steam to escape, preventing sogginess. Then, carefully turn the pan upside down to release the rolls onto a wire rack.
For serving, it’s best to enjoy these rolls warm, as they are at their peak flavor and texture. If you’ve made them in advance, simply reheat them in the oven for a few minutes before serving.
Pairing Suggestions for Cheesy Garlic Bliss Pull-Apart Rolls
One of the best aspects of Cheesy Garlic Bliss Pull-Apart Rolls is their versatility. They pair wonderfully with various dishes, enhancing your dining experience. Here are a few suggestions:
– Italian Pasta Dishes: Serve these rolls alongside rich pasta sauces, such as marinara or creamy Alfredo, to soak up every last bit.
– Hearty Soups: They make an excellent accompaniment to soups like minestrone or creamy tomato, providing a delightful contrast in texture.
– Salads: Pair with a fresh green salad tossed in a light vinaigrette for a balanced meal, allowing the rolls to shine as the star side dish.
– Beverages: Consider serving these rolls with a glass of red wine, sparkling water, or a light beer, which can complement the savory garlic and cheese flavors beautifully.
Conclusion
Creating and sharing Cheesy Garlic Bliss Pull-Apart Rolls is a joyful experience that enhances any meal. The process of baking these rolls from scratch invites you to embrace the art of cooking, and the end results are undeniably satisfying.
As you pull apart the soft, cheesy rolls and enjoy the burst of garlic flavor, you’ll feel a sense of accomplishment that comes from crafting something delicious and homemade. So, gather your ingredients, follow the steps, and indulge in the delightful aroma of freshly baked bread. You won’t just be feeding your body; you’ll be nourishing your soul as well. Enjoy the taste of your efforts and the smiles it brings to those you share it with!
Garlic Parmesan Pull-Apart Rolls
Discover the ultimate comfort food with Cheesy Garlic Bliss Pull-Apart Rolls! This irresistible recipe combines fluffy, warm bread with the rich flavors of garlic and gooey cheese, perfect for family gatherings or cozy nights in. Easy to make and fun to share, these rolls elevate any meal or snack time. Whether as an appetizer or a tasty side, their delightful texture and savory aroma will leave everyone craving more. Embrace the joy of homemade baking with this mouthwatering treat!
