Introduction to Frozen Yogurt Cherry Pie Coins
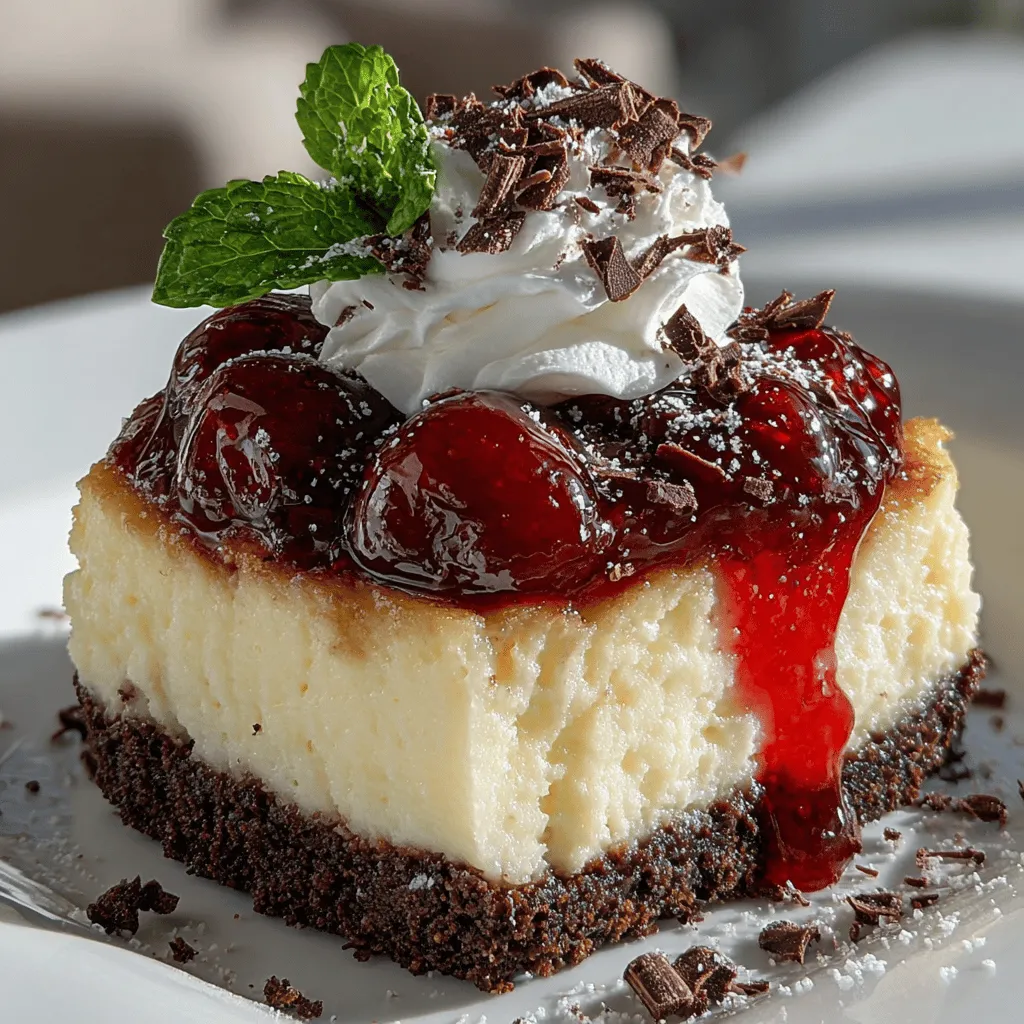
Frozen Yogurt Cherry Pie Coins are an exquisite fusion of flavors and textures, making them a standout dessert for any occasion. Picture a vibrant cherry filling made from ripe cherries, encased in a creamy layer of Greek yogurt, all nestled in a delightful chocolate-infused cookie crust. This recipe not only delivers on taste but also offers a healthier alternative to traditional desserts, allowing you to indulge without the guilt. Whether you’re hosting a summer barbecue, planning a family gathering, or simply craving a refreshing treat, these frozen yogurt coins are the perfect solution.
The concept of combining yogurt with fruit has gained popularity as a healthier dessert option in recent years. The tangy creaminess of Greek yogurt pairs beautifully with the sweetness of cherries, creating a balanced dessert that appeals to both adults and children alike. Moreover, the addition of a cookie crust adds a satisfying crunch, making each bite a delightful experience. In this article, we will explore the essential ingredients, the preparation methods, and the sheer enjoyment of savoring these frozen delights.
Understanding the Ingredients
To create the perfect Frozen Yogurt Cherry Pie Coins, it’s crucial to understand the role each ingredient plays in the recipe. From the cherry filling to the yogurt mixture and the cookie crust, each element contributes to the overall flavor and texture of the dessert.
Exploring the Cherry Filling
The cherry filling is the star of this dessert, and choosing between fresh or frozen cherries can greatly affect the final product. Fresh cherries, when in season, offer a burst of flavor and vibrant color that can elevate the dish. However, frozen cherries are a convenient alternative that can provide a year-round option. They are often picked at peak ripeness and flash-frozen, locking in their natural sweetness and nutrients.
Sugar plays a pivotal role in the cherry filling, balancing the tartness of the cherries and enhancing their sweetness. Depending on your taste preferences and the natural sweetness of the cherries, you may choose to adjust the amount of sugar used. Additionally, cornstarch acts as a thickening agent in the filling, ensuring a smooth and luscious texture that holds together well within the crust.
Lemon juice is another essential ingredient, adding a refreshing brightness that elevates the overall flavor profile. A splash of lemon juice can help to balance the sweetness while enhancing the natural flavors of the cherries. To round out the cherry filling, a dash of vanilla extract adds depth, complementing the fruitiness with its warm, aromatic notes.
Dissecting the Yogurt Mixture
The yogurt mixture is the creamy component that binds the dessert together. Greek yogurt is an excellent choice for this recipe due to its thick consistency and health benefits. Packed with protein and probiotics, Greek yogurt not only contributes to a satisfying texture but also makes the dessert a more nutritious option compared to traditional cream-based fillings.
When it comes to sweetening the yogurt, you have a couple of options: honey or maple syrup. Both natural sweeteners can add a hint of flavor while providing a healthier alternative to granulated sugar. The choice between these sweeteners can also depend on dietary preferences or restrictions.
In addition to sweetness, vanilla extract is crucial for infusing the yogurt with flavor. A pinch of salt is equally important as it helps to balance the sweetness and enhances the overall flavor profile of the yogurt mixture.
Analyzing the Cookie Crust
The cookie crust is the foundation of the Frozen Yogurt Cherry Pie Coins, providing a crunchy contrast to the creamy filling. While graham crackers are a classic choice for pie crusts, you can also explore other options, such as chocolate wafer cookies or even gluten-free alternatives. The key is to choose a crust that complements the flavors of the cherry and yogurt without overpowering them.
Cocoa powder is an exciting addition to the crust, adding richness and a hint of chocolate flavor that pairs beautifully with the cherries. This chocolate-infused crust elevates the dessert, making it even more indulgent while still maintaining a balance of flavors.
Unsalted butter and sugar are crucial components of the cookie crust, helping to bind the ingredients together while adding moisture and sweetness. The right proportion of these ingredients will ensure that your crust is both sturdy enough to hold the filling and delightfully crumbly.
Step-by-Step Preparation Guide
Now that we’ve covered the essential ingredients, it’s time to dive into the preparation process. Crafting the Frozen Yogurt Cherry Pie Coins involves a few key steps that will ensure your dessert turns out perfectly every time.
Crafting the Cherry Filling
Begin by preparing the cherry filling. Whether you choose fresh or frozen cherries, the first step is to pit and chop them if using fresh cherries. For frozen cherries, simply measure them out and allow them to thaw slightly. In a saucepan, combine the cherries with sugar, cornstarch, and lemon juice. The cooking process is crucial; gently heat the mixture over medium heat, stirring frequently. This will allow the cherries to release their juices while the cornstarch thickens the mixture, resulting in a rich, flavorful filling.
Once the filling has thickened, remove it from the heat and allow it to cool completely. This cooling process is vital before assembly, as it prevents the filling from melting the yogurt layer and ensures that the dessert maintains its structure.
Creating the Yogurt Mixture
While the cherry filling cools, you can create the yogurt mixture. In a large mixing bowl, combine Greek yogurt, your chosen sweetener, vanilla extract, and a pinch of salt. Using a hand mixer or a whisk, blend the ingredients together until smooth and creamy. It’s important to achieve the perfect consistency—thick yet spreadable—so take your time to blend thoroughly.
As you mix, taste the yogurt and adjust the sweetness to your liking. If you prefer a sweeter flavor, add a little more honey or maple syrup until it’s just right.
With both the cherry filling and yogurt mixture prepared, you’re now ready to assemble your Frozen Yogurt Cherry Pie Coins. This initial process sets the stage for creating a delectable dessert that will impress your family and friends. In the next section, we will guide you through the assembly and freezing process to ensure your dessert is a resounding success.

Assembling the Cookie Crust
Prepping the Oven: Importance of Temperature Control
Before diving into the assembly of your Frozen Yogurt Cherry Pie Coins, it’s essential to preheat your oven to the right temperature. A consistent and accurate oven temperature is crucial for achieving a perfectly baked cookie crust. Set your oven to 350°F (175°C). This temperature allows the cookies to bake evenly, creating a firm yet tender base that will hold the delicious filling.
Using an oven thermometer can help ensure your oven is calibrated correctly. Remember that opening the oven door frequently can cause temperature fluctuations, leading to uneven baking. Once the oven reaches the desired temperature, you can move forward with confidence in your crust.
Pressing Techniques: Ensuring a Firm Base
To create a sturdy foundation for your pie coins, the pressing technique is key. After preparing your cookie dough and allowing it to chill, take small, golf-ball-sized portions of the dough and place them on a parchment-lined baking sheet.
Using your fingers or the bottom of a glass, gently press down on each dough ball to flatten it into a disc about 1/4 inch thick. Make sure the edges are slightly thicker than the center, as this will help the crust maintain its shape during baking. Ensure that the discs are spaced at least two inches apart to allow for spreading.
For an added touch, you can use a fork to create a decorative pattern on the edges, which not only enhances the visual appeal but also helps to define the shape of the pie coins.
Baking Tips: Identifying the Right Doneness
Baking times can vary, so keep a close eye on your cookie crusts. Typically, they will need about 10-12 minutes in the oven. The key to identifying doneness is to look for a lightly golden color around the edges. The centers may still appear soft, but they will firm up as they cool.
Once baked, remove the cookies from the oven and allow them to cool on the baking sheet for a few minutes before transferring them to a wire rack. Cooling is vital, as it helps the crust set properly, ensuring a delicious crunch once assembled with the yogurt and cherry filling.
Putting It All Together: Assembling the Pie Coins
Layering the Ingredients: Order Matters
Now that your cookie crusts are ready, it’s time to assemble your pie coins. Start by spooning a generous layer of Greek yogurt onto each cooled cookie crust. The yogurt acts as a creamy base and pairs beautifully with the tartness of the cherries.
Next, add a layer of cherry filling over the yogurt. You can use fresh cherries or a homemade cherry compote. If you opt for the compote, ensure it is not too runny, as excess liquid can make your pie coins soggy. Spread the filling evenly, making sure to cover the yogurt layer completely.
To finish, you can top each pie coin with a sprinkle of crushed nuts or a drizzle of honey for added flavor and texture. The layering process is crucial, as it ensures that every bite contains the perfect balance of cookie, yogurt, and cherry.
Using Cookie Cutters: Tips for Neat Pie Coins
For a polished presentation, consider using cookie cutters to shape your pie coins. After baking and cooling the cookie crusts, use a round cookie cutter to cut out perfect circles. This technique not only enhances the visual appeal but also ensures uniformity in size, making for a more professional-looking dessert.
If you prefer a more rustic approach, simply leave the crusts as they are. Either way, the key is to ensure that each pie coin is filled and layered beautifully for an eye-catching dessert.
Freezing and Serving Suggestions
Freezing Techniques
Proper freezing methods are essential for preserving the texture and flavor of your Frozen Yogurt Cherry Pie Coins. After assembling the pie coins, place them in a single layer on a baking sheet lined with parchment paper. This prevents them from sticking together as they freeze.
Once they are frozen solid, transfer the pie coins into an airtight container or a freezer-safe zip-lock bag. Make sure to separate layers with parchment paper to avoid sticking. These pie coins can be stored in the freezer for up to three months, making them a convenient dessert option that’s always ready to enjoy.
Storage Tips: How to Keep Your Treats Fresh
For best results, store your pie coins in an airtight container in the freezer. If you plan to enjoy them within a week, you can keep them in the refrigerator instead. However, consuming them frozen is part of their charm, providing a refreshing and delightful treat on warm days.
When you’re ready to serve, simply take them out of the freezer and let them sit at room temperature for about 10-15 minutes for the ideal texture. This will soften them slightly while maintaining their frozen state.
Serving Ideas
Garnishes: Enhancing Presentation with Whipped Cream and Mint
Presentation plays a significant role in the enjoyment of desserts. When serving your Frozen Yogurt Cherry Pie Coins, consider garnishing them with a dollop of whipped cream and a sprig of fresh mint. This not only enhances the visual appeal but also adds a touch of freshness that complements the flavors beautifully.
Drizzling a bit of melted dark chocolate over the top can also elevate your dessert, making it an indulgent experience without compromising on health.
Pairing Options: What Drinks Complement This Dessert
Pairing your Frozen Yogurt Cherry Pie Coins with a refreshing beverage can elevate the overall dining experience. Consider serving them alongside a glass of sparkling water infused with lemon or mint, which will cleanse the palate and complement the tartness of the cherries.
For a more indulgent pairing, a cup of herbal tea or a light white wine can also work well, enhancing the flavors without overpowering them. Experiment with different combinations to find what suits your taste best.
Nutritional Benefits of Frozen Yogurt Cherry Pie Coins
Health Aspects of the Ingredients
One of the standout features of Frozen Yogurt Cherry Pie Coins is their healthfulness. Each ingredient contributes to a balanced nutritional profile, making this dessert not just a treat, but a wholesome option as well.
Nutritional Profile of Cherries: Antioxidants and Vitamins
Cherries are packed with antioxidants, vitamins, and minerals. They are particularly high in vitamin C, which supports the immune system, and potassium, which helps regulate blood pressure. The anti-inflammatory properties of cherries can also aid in recovery post-exercise, making these pie coins a great post-workout treat.
Benefits of Greek Yogurt: Protein and Probiotics
Greek yogurt is an excellent source of protein, which is essential for muscle repair and growth. Additionally, it contains probiotics that promote gut health, enhancing digestion. Opting for low-fat or non-fat Greek yogurt can also help keep the calorie count in check without sacrificing flavor or creaminess.
The Balance of Sweeteners: Natural vs. Processed
When it comes to sweetening your cherry pie coins, using natural sweeteners like honey or maple syrup can provide a healthier alternative to refined sugars. These options not only add sweetness but also come with their own set of nutrients, making your dessert healthier overall.
Why Choose Frozen Yogurt Cherry Pie Coins?
The Appeal of a Healthier Dessert
Frozen Yogurt Cherry Pie Coins are a fantastic choice for those looking to indulge in dessert without the guilt. With their blend of wholesome ingredients, they satisfy sweet cravings while providing essential nutrients.
Satisfying Sweet Cravings: Without Guilt
Unlike traditional desserts that can be loaded with sugar and unhealthy fats, these pie coins offer a refreshing, creamy experience that leaves you feeling satisfied and energized. They provide the joy of dessert while aligning with a health-conscious lifestyle.
Versatility: Adaptable for Various Dietary Needs
The recipe is also incredibly versatile. You can easily modify it to suit various dietary preferences, such as vegan alternatives using plant-based yogurt or gluten-free cookie options. This adaptability makes Frozen Yogurt Cherry Pie Coins a delightful treat for everyone at the table.
Conclusion: Savoring the Experience of Frozen Yogurt Cherry Pie Coins
Frozen Yogurt Cherry Pie Coins offer a unique way to enjoy dessert while incorporating healthier ingredients. This recipe not only delights the palate but also provides nutritional benefits, making it an ideal choice for dessert lovers looking for something refreshing and satisfying. With its simple preparation and vibrant flavors, it’s a treat that can be enjoyed by all, regardless of the occasion.
So, gather your ingredients, follow the steps outlined, and enjoy the delightful experience of creating and savoring these wholesome pie coins. They are sure to become a beloved dessert in your home, cherished for their taste, texture, and healthful qualities.
Frozen Yogurt Cherry Pie Coins

Discover the deliciousness of Frozen Yogurt Cherry Pie Coins, a delightful dessert combining ripe cherry filling with creamy Greek yogurt, all in a chocolate-infused cookie crust. This recipe offers a healthier treat option without sacrificing taste, perfect for any gathering or a refreshing summer snack. Learn the essential ingredients, preparation techniques, and serving suggestions to create this vibrant, guilt-free dessert that everyone will love. Enjoy the perfect blend of flavors!


