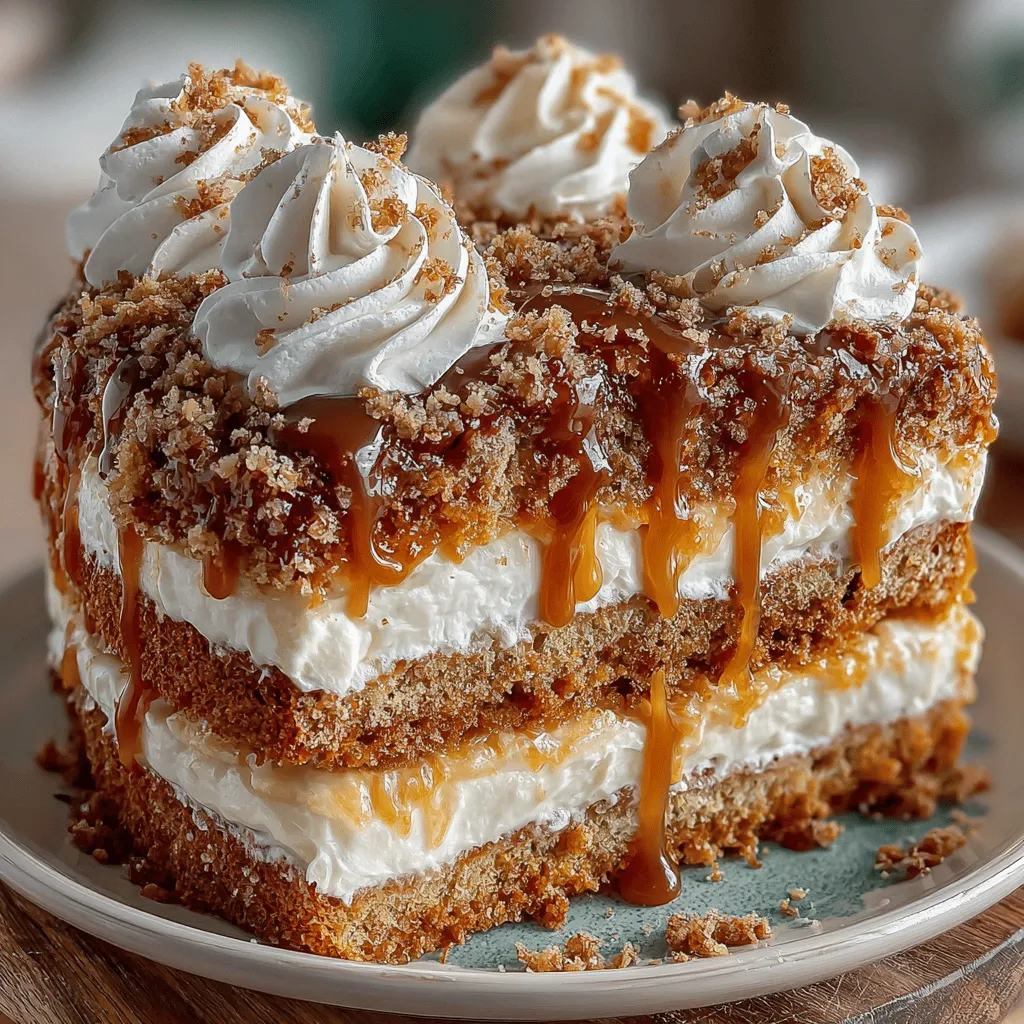
Pumpkin Cheesecake Layer Cake Recipe
As the leaves begin to change color and the air turns crisp, there’s a certain excitement that comes with the arrival of autumn. One of the most beloved aspects of this season is the resurgence of pumpkin desserts. From lattes to pies, pumpkin-flavored treats captivate our taste buds and evoke a sense of warmth and nostalgia. Among these delightful options, the Pumpkin Cheesecake Layer Cake stands out as a remarkable fusion of flavors and textures, combining the velvety richness of cheesecake with the moist, spiced goodness of pumpkin cake. This decadent dessert is not only visually stunning but also a true crowd-pleaser, making it an ideal centerpiece for gatherings and special occasions.
Homemade desserts like the Pumpkin Cheesecake Layer Cake hold a special place in our hearts, often serving as the highlight of family dinners and holiday celebrations. There’s something incredibly satisfying about crafting a dessert from scratch, knowing that each layer has been made with care and attention. As we dive into this recipe, you’ll discover not only how to create this impressive cake but also the importance of each ingredient and technique to ensure your creation is nothing short of spectacular.
Understanding the Ingredients
Before embarking on the journey to create your Pumpkin Cheesecake Layer Cake, it’s essential to understand the key ingredients that contribute to its unique flavor and texture. Each element plays a crucial role in the overall outcome of the cake, so let’s take a closer look.
Pumpkin Puree and Spices
At the heart of this recipe is pumpkin puree, which provides the cake with its signature flavor and moistness. Using real pumpkin puree, whether homemade or canned, is vital for achieving that rich, earthy taste associated with fall. Combined with warm spices such as cinnamon, nutmeg, and ginger, the pumpkin transforms into a comforting blend that envelopes your senses in autumnal bliss. These spices not only enhance the flavor profile but also create an aromatic experience that fills your kitchen as the cake bakes.
Sugars: Granulated vs. Brown
The choice of sugars in this recipe also impacts the final texture and flavor. Granulated sugar is commonly used for its ability to sweeten without adding moisture, while brown sugar contributes a deeper flavor and a hint of molasses. The combination of both sugars in the cake layers can provide a perfect balance—granulated sugar for structure and sweetness, and brown sugar for moisture and richness. This dual approach enhances the cake’s overall taste, making each bite a delightful experience.
Cream Cheese
Cream cheese is another essential ingredient that brings richness and creaminess to both the cheesecake filling and the frosting. When mixed properly, cream cheese creates a smooth, velvety texture that contrasts beautifully with the fluffy pumpkin cake layers. It’s important to use room temperature cream cheese to avoid lumps in your filling; this step ensures that the cheesecake bakes evenly and achieves that luxurious mouthfeel we all crave.
Preparation of Pumpkin Cake Layers
Now that we’ve covered the essential ingredients, let’s dive into the first steps of preparing the pumpkin cake layers. This process is straightforward but requires attention to detail to achieve a perfect cake.
Step 1: Gather Your Ingredients
Begin by gathering all your ingredients, which typically include flour, sugar, baking powder, baking soda, spices, pumpkin puree, eggs, and oil. Having everything at your fingertips will make the mixing process smoother and more efficient.
Step 2: Combine Dry Ingredients
In a mixing bowl, sift together the flour, baking powder, baking soda, and spices. Sifting not only helps to aerate the flour, ensuring a lighter cake, but it also breaks up any clumps of baking powder or spices, leading to a more uniform distribution throughout the batter.
Step 3: Mix Wet Ingredients
In a separate bowl, whisk together the pumpkin puree, eggs, oil, and sugars until well combined. The oil contributes moisture to the cake, while the eggs provide structure. Mixing the wet ingredients thoroughly ensures that the sugars dissolve completely, resulting in a smooth batter.
Step 4: Combine Wet and Dry Mixtures
Gradually add the dry mixture to the wet ingredients, mixing gently until just combined. Overmixing can lead to a dense cake, so it’s crucial to stop as soon as the flour is incorporated. The batter should be thick and slightly lumpy, which is perfectly fine.
Step 5: Preparing the Cake Pans
Properly greasing and flouring your cake pans is essential for ensuring easy release once the cakes are baked. Use a non-stick spray or butter to coat the pans, then sprinkle a light layer of flour, tapping out any excess. This step prevents the cake from sticking and helps maintain its beautiful shape.
Step 6: Baking the Layers
Preheat your oven to the specified temperature (usually around 350°F or 175°C). Divide the batter evenly between the prepared pans and smooth the tops with a spatula. Place the pans in the oven and bake for about 25-30 minutes, or until a toothpick inserted into the center comes out clean. Keep an eye on them towards the end of the baking time, as ovens can vary.
To check for doneness, gently press the center of the cake with your finger—if it springs back, it’s ready. Allow the cakes to cool in the pans for about 10 minutes before transferring them to a wire rack to cool completely.
Making the Cheesecake Filling
Once your pumpkin cake layers have cooled, it’s time to transition to preparing the cheesecake filling. The filling is where the magic truly happens, adding a rich and creamy element that elevates the entire dessert.
Step 1: Prepare Your Ingredients
Start by gathering your cream cheese, sugar, eggs, and any additional flavorings you plan to use, such as vanilla extract. Ensure that the cream cheese is at room temperature to facilitate easy mixing and a smooth texture.
Step 2: Beat the Cream Cheese
In a mixing bowl, beat the cream cheese until it’s smooth and creamy. This step is crucial for eliminating lumps and ensuring a silky filling. Gradually add the sugar, mixing until well incorporated.
Step 3: Add the Eggs
Add the eggs one at a time, beating well after each addition. This method allows the mixture to emulsify properly, ensuring a cohesive filling. Be careful not to overmix; just combine until the eggs are fully integrated.
Step 4: Prepare for Baking
Once your cheesecake filling is smooth, it’s ready to be poured over the pumpkin cake layers. However, if you’re baking the cheesecake separately, remember to adjust the temperature and baking time accordingly. A water bath can also be beneficial for achieving a creamy texture and preventing cracks in the cheesecake.
These initial steps set the foundation for creating a memorable Pumpkin Cheesecake Layer Cake that will be the highlight of any celebration. With a little patience and attention to detail, you’ll be well on your way to impressing your friends and family with this stunning dessert.
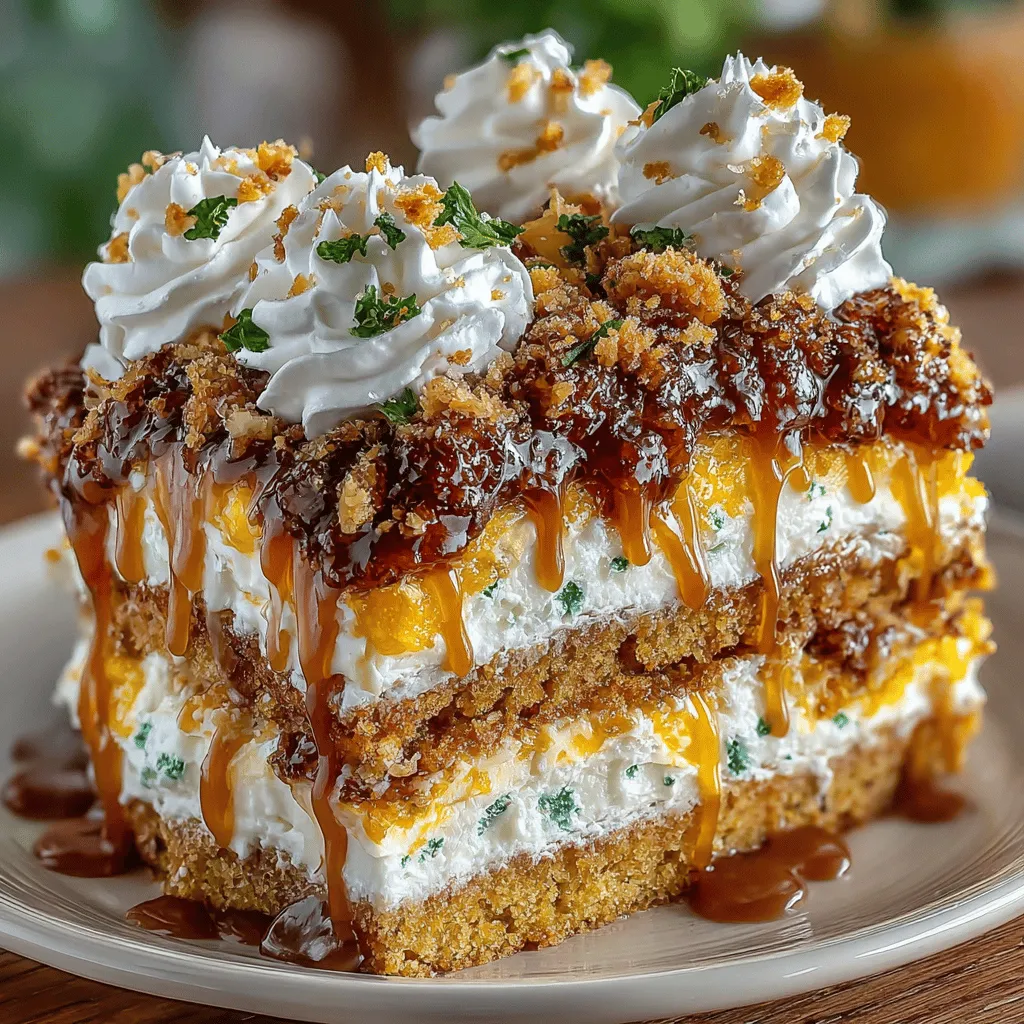
Creating an impressive pumpkin cheesecake layer cake is a delightful way to celebrate the flavors of fall. With its luscious layers of spiced pumpkin cake and creamy cheesecake, this dessert is sure to be a showstopper at your gatherings. In this section, we will dive deeper into essential tips for ensuring your cheesecake sets perfectly, crafting the perfect cream cheese frosting, assembling the cake, and serving suggestions that will elevate your dessert experience.
Tips for Ensuring the Cheesecake Sets Properly and Doesn’t Crack
Achieving a beautifully set cheesecake is crucial for the success of your pumpkin cheesecake layer cake. Below are some tips to help you ensure that your cheesecake layers turn out flawlessly:
1. Room Temperature Ingredients: Begin by allowing your cream cheese and eggs to come to room temperature. This helps to achieve a smooth batter and encourages even baking.
2. Avoid Overmixing: When incorporating the eggs into the cream cheese mixture, mix just until combined. Overmixing can incorporate too much air, leading to cracks as the cheesecake bakes.
3. Water Bath Method: Consider baking your cheesecake in a water bath (bain-marie) to maintain a gentle baking environment. Wrap the outside of your springform pan with aluminum foil to prevent leaks, then place it in a larger pan filled with hot water. This helps to regulate the temperature and moisture, yielding a smooth surface.
4. Proper Cooling: Once baked, turn off the oven and leave the cheesecake inside with the door slightly ajar for about an hour. This gradual cooling process prevents sudden temperature changes that can cause cracks.
5. Chilling Time: After the cheesecake has cooled to room temperature, refrigerate it for at least four hours, preferably overnight. This resting period allows the flavors to meld and the cheesecake to firm up.
Crafting the Cream Cheese Frosting
Once your cheesecake is set and you’re ready to assemble your cake, it’s time to whip up the cream cheese frosting. Here’s how to create a frosting that balances flavor and texture perfectly.
Detailed Guide on Whipping Up the Cream Cheese Frosting
1. Ingredients: Gather the following ingredients:
– 8 oz cream cheese, softened
– 1/2 cup unsalted butter, softened
– 4 cups powdered sugar (sifted)
– 1-2 tablespoons milk
– 1 teaspoon vanilla extract
– Pinch of salt (optional)
2. Mixing Method: In a large mixing bowl, combine the softened cream cheese and butter. Using an electric mixer, beat on medium speed until smooth and creamy, about 2-3 minutes.
3. Incorporate Sugar: Gradually add the sifted powdered sugar, one cup at a time, mixing on low speed to prevent a sugar cloud. Increase to medium speed once combined, and mix until fluffy.
4. Adjusting Consistency: If your frosting is too thick, add milk one tablespoon at a time until the desired spreadable consistency is achieved. If it’s too thin, add more powdered sugar.
5. Flavor Balance: For optimal flavor, ensure the cream cheese is the dominant flavor while the butter adds a silky mouthfeel. The pinch of salt can enhance the overall flavor profile.
Assembling the Pumpkin Cheesecake Layer Cake
Now that your cake layers and cheesecake are ready, it’s time for the fun part—assembling your cake!
Step-by-Step Guide to Assembling the Cake Layers
1. Layer Setup: Start with one layer of pumpkin cake on a serving plate. Spread a generous layer of cream cheese frosting over the top, followed by a layer of cheesecake. Repeat this process with the second layer of pumpkin cake.
2. Chilling Between Layers: After each layer is added, place the cake in the refrigerator for about 30 minutes. This chilling time helps the layers set and makes it easier to frost the cake.
Techniques for Applying a Crumb Coat
1. Crumb Coat Application: Once all layers are stacked, apply a thin layer of frosting around the entire cake to trap any loose crumbs. This is known as the crumb coat. It doesn’t have to be perfect; the goal is to create a smooth surface for the final layer of frosting.
2. Chill Again: After the crumb coat is applied, refrigerate the cake for another 30 minutes. This sets the crumb coat and makes the final frosting layer easier to apply.
Tips for Achieving a Smooth Finish on the Cake
1. Final Frosting Layer: Once the crumb coat is set, use an offset spatula or a bench scraper to apply a thicker layer of frosting. Start from the top and work your way down the sides for an even finish.
2. Smoothing Techniques: To achieve a smooth finish, dip your spatula in warm water and run it along the sides of the cake, smoothing as you go. Wipe the spatula between strokes for best results.
3. Creative Garnishing Ideas: Consider garnishing your cake with crushed graham crackers, candied pecans, or a sprinkle of cinnamon. Fresh or candied pumpkin slices can also be used for an elegant touch.
Serving Suggestions and Pairings
Now that your pumpkin cheesecake layer cake is beautifully assembled and decorated, it’s time to think about serving it. Here are some ideas to enhance the experience.
Ideas for Serving the Pumpkin Cheesecake Layer Cake
1. Portion Sizes: A 9-inch cake typically serves 10-12 people. For larger gatherings, consider cutting the cake into smaller slices to allow guests to sample other desserts.
2. Presentation: Serve the cake on a decorative cake stand to elevate its visual appeal. Pair slices with a dollop of whipped cream or a drizzle of caramel sauce for an indulgent touch.
Suggested Beverages That Complement the Flavors
1. Spiced Cider: A warm glass of spiced apple cider pairs perfectly with pumpkin flavors, enhancing the cozy fall vibe.
2. Coffee: A cup of freshly brewed coffee or a pumpkin spice latte is an excellent accompaniment, balancing the creaminess of the cheesecake with rich, robust flavor.
3. Tea: Consider serving with chai or ginger tea, which complements the spices in the cake beautifully.
Recommendations for Occasions Where This Cake Would Shine
– Thanksgiving: This cake makes a stunning centerpiece for your Thanksgiving dessert table, combining the beloved flavors of pumpkin and cheesecake.
– Fall Parties: Whether it’s a Halloween gathering or an autumn celebration, this cake will undoubtedly impress your guests.
– Family Gatherings: Share the joy of homemade baking with loved ones during family dinners or special occasions.
Conclusion
The Pumpkin Cheesecake Layer Cake is a delightful fusion of flavors and textures that captures the essence of fall. With its layers of moist pumpkin cake and rich cheesecake, every bite is a celebration of seasonal ingredients. From crafting the perfect cream cheese frosting to assembling and decorating the cake, this recipe offers a rewarding baking experience.
As you prepare to make this cake, remember that baking is not just about the final product; it’s about the joy of creating something special to share with friends and family. So, roll up your sleeves, embrace the warmth of your kitchen, and enjoy the process. This cake will surely become a cherished recipe in your collection, perfect for any fall gathering or celebration. Happy baking!
Pumpkin Cheesecake Layer Cake
Embrace the flavors of fall with this Pumpkin Cheesecake Layer Cake recipe! Combining the moist richness of pumpkin cake with a velvety cheesecake filling, this dessert is perfect for autumn celebrations. The detailed guide walks you through every step, from selecting quality ingredients to assembling your masterpiece. Impress family and friends with this stunning centerpiece that captures the essence of the season. Bake your way to a memorable gathering with this delightful creation!
